Thursday, December 19, 2019

Laravel's Bootstrapping process

I will try my best to simplify Laravel's Bootstrapping process. Some terms to understand before we focus on bootstrapping process:
Service Container - holds different components which can be used in your application
Facades - Laravel has lots of features and helpers. For example helpers regarding URL, Response, Route, Session, Request etc. These are loaded into service container. Facsdes makes it possible to access these features without going through service container, and can be accessed directly.
Middleware - is a code executed on each request. For example, setting up the session. cookie encryption etc. Middleware is required by each request.
Service Providers - are classes required by your application. These are not loaded on each request, but only when the service they provide are actually needed.
Kernel - is responsible for loading all the middleware, service providers
When a web page is requested, the request first goes to index.php. This file does very important things. First it auto-loads all the classes used in your application.
After that it sets up the laravel application i.e. laravel framework. One of the first thing laravel framework does is - it creates the service container. At this point the service container is empty.
After that framework creates kernal. Kernal loads all the middleware required by the application. One of the most important task of the kernal, there after, is to load all the service providers i.e. to load all the components into the service container.
The list of all the service providers loaded are in the config/app.php file i.e. providers array. This array defines which components are loaded into your service container.
These components can be accessed via facades. The list of all facades are also present in the config/app.php as aliases array. These facades are simply short-cuts to all the components loaded into the service container. This finishes the bootstrap process.
After all this, request is then handed over to the router i.e. routes/web.php file.

Friday, December 6, 2019

2 ways to activate Windows 10 for FREE without additional software

Run KMS commands on command prompt.
  1. Open Command Prompt as administrator.
    Click on the start button, search for “cmd” then run it with administrator rights.
  2. Install KMS client key
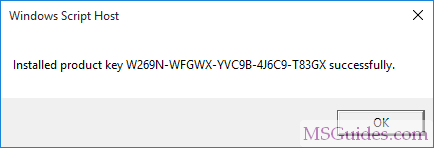
    Use the command “slmgr /ipk yourlicensekey” to install a license key (yourlicensekey is the activation key that corresponds to your Windows edition). The following is the list of Windows 10 Volume license keys.

    Home: TX9XD-98N7V-6WMQ6-BX7FG-H8Q99
    Home N: 3KHY7-WNT83-DGQKR-F7HPR-844BM
    Home Single Language: 7HNRX-D7KGG-3K4RQ-4WPJ4-YTDFH
    Home Country Specific: PVMJN-6DFY6-9CCP6-7BKTT-D3WVR
    Professional: W269N-WFGWX-YVC9B-4J6C9-T83GX
    Professional N: MH37W-N47XK-V7XM9-C7227-GCQG9
    Education: NW6C2-QMPVW-D7KKK-3GKT6-VCFB2
    Education N: 2WH4N-8QGBV-H22JP-CT43Q-MDWWJ
    Enterprise: NPPR9-FWDCX-D2C8J-H872K-2YT43
    Enterprise N: DPH2V-TTNVB-4X9Q3-TJR4H-KHJW4

    (Note: You need to hit [Enter] key to execute commands.)

    1. Set KMS machine address
      Use the command “slmgr /skms kms8.msguides.com” to connect to my KMS server.
    2. Activate your Windows
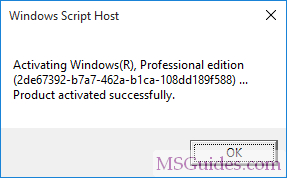
      The last step is to activate your Windows using the command “slmgr /ato”.
      Now check the activation status again.
  3. Source: https://msguides.com/microsoft-software-products/2-ways-activate-windows-10-free-without-software.html

Thursday, October 10, 2019

How to run laravel project on server without public folder

just replace the below code in your root .htaccess  file.

<IfModule mod_rewrite.c>
    <IfModule mod_negotiation.c>
        Options -MultiViews
    </IfModule>

    RewriteEngine On

    RewriteCond %{REQUEST_FILENAME} -d [OR]
    RewriteCond %{REQUEST_FILENAME} -f
    RewriteRule ^ ^$1 [N]

    RewriteCond %{REQUEST_URI} (\.\w+$) [NC]
    RewriteRule ^(.*)$ public/$1 

    RewriteCond %{REQUEST_FILENAME} !-d
    RewriteCond %{REQUEST_FILENAME} !-f
    RewriteRule ^ server.php
</IfModule>

Friday, August 23, 2019

When form is validated, how to SCROLL to the first error instead of jumping?

Here's what you can do:
  • By default the validate plugin focuses the first erroneous element (in case there's any). Turn off the option focusInvalid by setting it to false.
  • The callback invalidHandler handler is executed when the form is invalid. You get access through the second parameter validator to the validator object and thus to the errorList array. You can then animate the scroll relatively to the first erroneous element.
Here's the code:
$("#commentForm").validate({
    focusInvalid: false,
    invalidHandler: function(form, validator) {

        if (!validator.numberOfInvalids())
            return;

        $('html, body').animate({
            scrollTop: $(validator.errorList[0].element).offset().top
        }, 2000);

    }
});
DEMO

Source: https://stackoverflow.com/questions/9392133/when-form-is-validated-how-to-scroll-to-the-first-error-instead-of-jumping

Thursday, August 22, 2019

How to save imges to user's local computer using HTML2canvas

To be able to download the image to the user computer, you may use something like this:


Html

<html>
    <head></head>
    <body>
        <div id="boundary">
            <div class="content">
                <p>My content here</p>
            </div>
        </div>

        <button id="download">Download</button>

    </body>
</html>

Javascript

Based on Krzysztof answer
document.getElementById("download").addEventListener("click", function() {

    html2canvas(document.querySelector('#boundary')).then(function(canvas) {

        console.log(canvas);
        saveAs(canvas.toDataURL(), 'file-name.png');
    });
});


function saveAs(uri, filename) {

    var link = document.createElement('a');

    if (typeof link.download === 'string') {

        link.href = uri;
        link.download = filename;

        //Firefox requires the link to be in the body
        document.body.appendChild(link);

        //simulate click
        link.click();

        //remove the link when done
        document.body.removeChild(link);

    } else {

        window.open(uri);

    }
}

Monday, August 19, 2019

How to Print Page Area using JavaScript

Print web page content is a commonly used feature in the web project. You can find many jQuery Plugin to print specific area or full page. This article provides a simple way to print specific div content or full page content using JavaScript. Here we’ll create a JavaScript function to print div content, page area, and full web page content.
printPageArea() function contains some JavaScript code which helps you to implement print feature easily in the web page. It will provide the simplest way to print specific area of web page.

JavaScript Code:

printPageArea() function opens a new window with web page content and printing option based on the provided element ID. You can use this function for print a specific area of web page or full web page content.
function printPageArea(areaID){
    var printContent = document.getElementById(areaID);
    var WinPrint = window.open('', '', 'width=900,height=650');
    WinPrint.document.write(printContent.innerHTML);
    WinPrint.document.close();
    WinPrint.focus();
    WinPrint.print();
    WinPrint.close();
}
Use printPageArea() function on onclick event of print button element and provide the content area div ID which you want to print.
printPageArea('elementID')

HTML Code:

The print button which will trigger printPageArea() function on clicking on it.
<a href="javascript:void(0);" onclick="printPageArea('printableArea')">Print</a>
HTML content which needs to be printed.
<div id="printableArea">
    All the printable content goes here......
</div>
Source: https://www.codexworld.com/print-page-area-javascript/


Wednesday, August 7, 2019

AJAX request in WordPress

Client Action:

We use JavaScript/jQuery to write the client action script. Here is the simple code which you can use to send the AJAX request with parameters:

var my_selected_question = 55;
jQuery.ajax({
url: '/wp-admin/admin-ajax.php',
type: 'POST',
data: { action: 'process_wheel_credit_value',credit_value:my_selected_question},
        success: function(data) {
         alert(data);
},
error: function() {
alert('There has been an error, please alert us immediately');
}
});

Server Action:

After sending the AJAX request via JavaScript/jQuery, we have to process this request on server to send the response to the client. We use WordPress Actions to handle this AJAX request. WordPress will read the value of action parameter to call the corresponding method on server. In the above case we have used “my_ajax_request”.

Now you have to add the below function in the functions.php file of WordPress theme.

// register the ajax action for authenticated users
add_action('wp_ajax_process_wheel_credit_value', 'process_wheel_credit_value');
// register the ajax action for unauthenticated users
add_action('wp_ajax_nopriv_process_wheel_credit_value', 'process_wheel_credit_value');

function process_wheel_credit_value()
{
if(isset($_POST['credit_value']) && !empty($_POST['credit_value'])){
echo $_POST['credit_value'];
//add your logic here
}
}

Tuesday, July 23, 2019

Convert Date Format in PHP

This tutorial uses PHP strtotime() and date() functions to convert date time format. For example you have stored a date YYYY-MM-DD format in a variable and need to change this to MM-DD-YYYY format.
We can achive this by converting date first to seconds using strtotime() function. After that reconstruct date to any format using date() function. Below is few examples of conversion:

1. Change YYYY-MM-DD => MM-DD-YYYY

Here we have date yyyy-mm-dd (“2019-01-15”) format and converting it to mm-dd-yyyy (“01-15-2019”) format.
Output:
01-15-2019

2. Change YYYY-MM-DD => DD-MM-YYYY

Here we have date yyyy-mm-dd (“2019-01-15”) format and converting it to dd-mm-yyyy (“15-01-2019”) format.
Output:
15-01-2019

3. Change DD/MM/YYYY => YYYY-MM-DD

If you have slashes in date format like “15/01/2019” and need to convert / with hyphens (-). The following example will help you to convert DD/MM/YYYY (“15/01/2019”) to YYYY-MM-DD (2019-01-15).
Output:
2019-01-15

How to backup and download Database using PHP

< ?php $mysqlUserName = 'databaseusername' ; $mysqlPassword = 'databasepassword' ; $mysqlHostNa...